Getting a bit arty
Years ago my daughter learned how to do linocuts as part of her TEE art programme. She made me a gorgeous cushion cover, printed from one of her designs — and I still sit on the cushion at my desk everyday, 15+ years later. At the time I thought it would be good fun to try out linocuts too, perhaps to print some fabric or cards. Every now and then I’d think of it again as something I’d get to eventually, but somehow the years passed and it never quite got to the top of my to-do list.
Then, just recently, a friend sent me a link about a one-day linocut workshop at Jude Taylor’s studio in the Swan Valley. I pounced on the opportunity without a moments hesitation. It was clearly time to make some space for creativity in my life – and I was delighted to be able to do so under instruction from one of WA’s top print makers.
The workshop was a very full day. We started by working on the design phase, which took a fair while as most people drew their designs from scratch. I, however, had trawled the internet for pictures until I found something that appealed and took the picture along to the class, where I redrew it and augmented it with some vaguely leafy shapes in the background. To do this I had to actually go out into the gardens and collect some leaves to copy, since drawing is not something that comes naturally to me.
Once all the sketching was done, the next step was to rub compressed charcoal on the back of the design, turn it right way up on top of the lino (actually a medium called combi board, but I’ll just refer to it as lino for the sake of simplicity), and then go over the lines with a sharp pencil to transfer them. Putting the sketch aside, we all went over our designs (now on the lino) with marking pen, then coloured in the sections of the design that we wanted to be the focus of our prints. This step made it much easier to see where to cut the lino and where to leave it intact a little later on.
After a very relaxing and chatty break for lunch (super tasty corn and leak soup, plus a pumpkin muffin an much-needed caffeine hit) we finally got down to carving out our designs. This turned out to be easier than I thought it would be. The medium is quite soft and as a result the tools are easier to control than (my experience of) wood carving tools. This aside, there were a few ‘oops’ moments when I overshot an edge of the design and then had to change it ever so slightly to incorporate what Jude referred to as happy mistakes.
It was fascinating to see how everyone’s designs changed as we went through the process of cutting, test printing and recutting to refine and tidy them. Each test print was put up on a board so that we could step back and look at them analytically. Then came the iterative process of assessment, tweaking, reprinting and checking our respective designs until they were how we wanted them – after which the printing press ran hot!
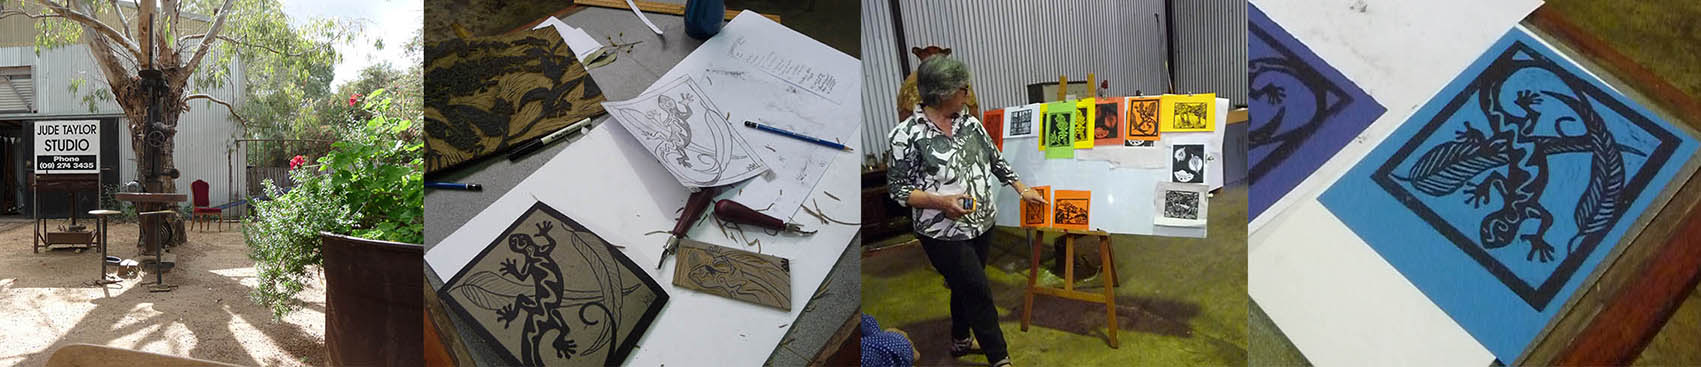
For someone who generally has restrained hysterics at the very thought of drawing, this workshop was remarkably enjoyable. The energy and enthusiasm that Jude shared with us was uplifting, as was the pleasure she very clearly experienced in doing so. The end of the day rushed in all too quickly, but we all left on a high. It was a great day of creative fun and this is definitely a do-more craft for me. I didn’t make a cushion cover, but I did create a pretty attractive gecko picture. Perhaps I’ll use the design on some fabric in the holidays and make some crazily colourful outdoor seat covers for the patio.
One thought on “Getting a bit arty”